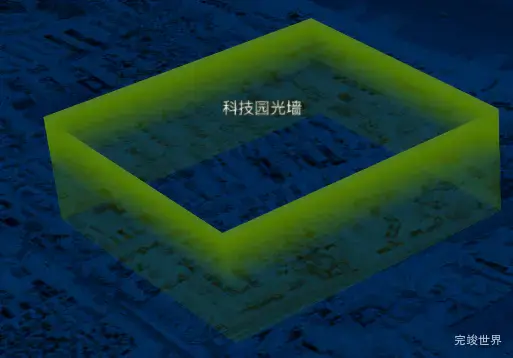
上一节我们学习了:cesium实现六边形光波扩散特效今天我们要学习的是cesium着色器编写区域光墙。
动态效果
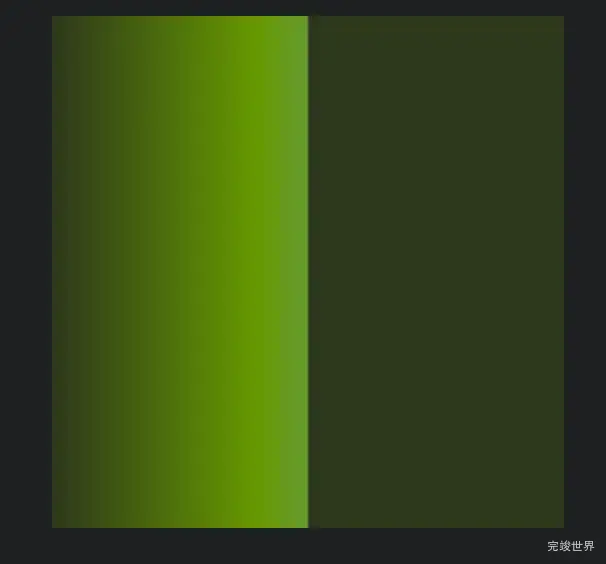
## 首先准备一张图片
首先需要准备一张图片,为接下来的光墙做准备。
创建一个围墙
我们使用fromDegreesArrayHeights来创建一个围墙,fromDegreesArrayHeights我们在之前的cesiumjs 多边形_体积折线_矩形_椭球体设置中学过。
this.entity = viewer.entities.add({
  name: "lightWall",
  position: Cesium.Cartesian3.fromDegrees(113.3081, 23.101, 200),
  wall: {
    positions: Cesium.Cartesian3.fromDegreesArrayHeights([
      113.3051, 23.099, 200.0, 113.3101, 23.099, 200.0, 113.3101, 23.104,
      200.0, 113.3051, 23.104, 200.0, 113.3051, 23.099, 200.0,
    ]),
    material: this.LightWallMaterial,
    // outline: true,
  },
  label: {
    text: "科技园光墙",
    font: "16px sans-serif",
    style: Cesium.LabelStyle.FILL_AND_OUTLINE,
    // outlineWidth: 2,
    verticalOrigin: Cesium.VerticalOrigin.BOTTOM,
    pixelOffset: new Cesium.Cartesian2(0, -20),
    fillColor: Cesium.Color.WHITE,
    // outlineColor: Cesium.Color.BLACK,
  },
});
给墙设置材质
接下来我们来给墙设置材质。并设置动画效果.
Cesium.Material._materialCache.addMaterial("LightWallMaterial", {
  fabric: {
    type: "LightWallMaterial",
    uniforms: {
      uTime: 0,
      image: img,
    },
    source: `
      czm_material czm_getMaterial(czm_materialInput materialInput)
      {
        // 生成默认的基础材质
        czm_material material = czm_getDefaultMaterial(materialInput);
        vec2 st = materialInput.st;
        // 根据uv采样颜色,fract函数,保留小数部分
        // vec4 color = texture2D(image, vec2(fract(st.x-uTime) , st.y));
        vec4 color = texture2D(image, vec2(fract(st.y+uTime) , st.x ));
        material.diffuse = color.rgb;
        material.alpha = color.a;
        return material;
      }

      `,
  },
});
实例演示地址
当前内容为观看threejs视频 Three.js可视化企业实战WEBGL课 课程-着色器实现旋转雷达特效-实践的学习笔记
当前学习笔记实例代码下载
代码运行环境:vue3 + vite + js nodejs 14


